Thursday, January 27, 2011

Thai obsession

If you know me well, you'd know about my love for Thai food. Thai cuisine although usually consisting of a lot of aromatic ingredients  is usually lightly prepared. The combination of flavours used can be highly addictive! Back home in Wellington, New Zealand, there is a fantastic thai restaurant located down the road from the office where I used to work. My friends and I would make frequent visits there on our lunch breaks. Aroy Thai Express - owned by a friend of mine, of course originally from Thailand.  If you're ever in Wellington, New Zealand, definitely pay Aroy on Cuba Street in the CBD a visit. You'll find yourself going back for more! 


My favourite Thai dish has always been the 'Larb' or 'Laab' Chicken - a light thai dish consisting of ground minced chicken, flavoured with fish sauce, lime juice and fresh herbs. The chicken is mixed with chilli, mint and sometimes various vegetables. 


I decided to try making Pad Thai noodles instead this week. I love a challenge from time to time, and was told my one of my Thai friends that this dish was a bit harder than Laab Chicken to imitate. 'Pad' Thai or 'Phat' Thai is a stir-fried rice noodle dish consisting of fish sauce, eggs, fish sauce, red chilli pepper, tamarind juice, bean sprouts, chicken or shrimp, and topped off with crushed peanuts, lime and coriander. 


I shot the first two images here with the Canon EF 70-200mm f/2.8 L IS USM lens we hired over the weekend. I used this lens with the intention of compressing or stacking the objects behind each other at different distances in the field of view. I have found this lens to be useful in that it allowed me to place these objects behind each other without the viewer knowing how much distance actually lied between them. It allows you to fill your frame more effectively. I used an aperture of f/ 10 here, so that the objects were all in sharp focus with a little bit of the coriander at the back dropping off.  


My Pad Thai noodles was somewhat of a success... one issue- I forgot the eggs!! No wonder it turned out a little too moist... 


Pad Thai Noodles
(Serves 2) Recipe by Darlene Schmidt
  • 8 oz. thai rice noodles (banh pho noodles) or enough for 2 people
  • 1 ½ cups raw chicken breast or thigh meat, sliced
  • 2 tsp cornstarch
  • 2 Tbsp soy sauce
  • 4 cloves garlic, minced
  • 1-2 fresh red chillies, minced
  • 2 eggs
  • 3 cups fresh bean sprouts
  • 3 spring (green) onions, sliced
  • 1 cup fresh coriander
  • cup chopped or crushed peanuts
  • ½ cup chicken stock
  • ¼ tsp freshly ground white pepper
Sauce
  • ¾ Tbsp tamarind paste (dissolved in ¼ cup warm water)
  • 2 Tbsp fish sauce
  • ¼ tsp chilli flakes or cayenne pepper
  • 3 Tbsp brown sugar
DIRECTIONS
  1. Bring a large pot of pot to a boil and remove from heat. Dunk in your rice noodles. Allow noodles to soak while you prepare the other ingredients. Note: you will be frying the noodles later, so you don't want to over-soften them now. Noodles are ready to be drained when they are soft enough to be eaten, but are still firm and a little crunchy. Drain and rinse with cold water. Set aside.
  2. Make the Pad Thai Sauce by combining the sauce ingredients together in a cup. Stir well to dissolve the tamarind paste and brown sugar. Set aside. Note: this may seem like a lot of sugar, but you need it to balance out the sourness of the tamarind - this balance is what makes Pad Thai taste so amazing!
  3. Place chicken slices in a small bowl. Pour the marinade (2 tsp. cornstarch dissolved in 2 Tbsp. soy sauce) over the chicken. Stir well and set aside.
  4. Warm up a wok or large frying pan over medium-high heat. Add 1-2 Tbsp. oil plus garlic and minced chili, if using. Stir-fry until fragrant (30 seconds).
  5. Add chicken together with the marinade. Stir-fry 30 seconds to 1 minute. When wok/pan becomes dry, add a little chicken stock, 1-2 Tbsp. at a time, to keep the chicken frying nicely. Continue stir-frying in this way until the chicken is cooked (5-8 minutes).
  6. Using a spatula or wooden spoon, push chicken to the outside of the wok or pan. Now add the egg, pouring it into the space you've made in the centre. Quickly stir-fry until egg is cooked (this part is like making scrambled eggs).
  7. Add the noodles, and pour the Pad Thai sauce over. Using two spatulas, wooden spoons, or other utensils, immediately stir-fry the noodles. Use a gentle "lift and turn" method (like tossing a salad) to prevent noodles from breaking. Stir-fry in this way 1-2 minutes. If you find your wok/frying pan too dry, push noodles aside and add a little more oil to the bottom (but no more broth, or the noodles will become soggy).
  8. Add the bean sprouts and sprinkle over the pepper. Continue tossing 1 more minute, or until noodles are cooked. Noodles are done to perfection when they are no longer hard or crunchy, but chewy-sticky wonderful!
  9. Taste-test for seasoning, adding more fish sauce until desired flavor is reached. Toss well to incorporate.
  10. Lift noodles onto a serving plate. Top with generous amounts of fresh coriander, spring onion, and crushed/chopped nuts. Add fresh lime wedges (lime is great squeezed overtop).


Wednesday, January 26, 2011

Composition with Congee

You hear it being repeated over and over again - food photography is not just about cooking up a nice meal and taking a photo. Its about styling, composition, props, lighting, colours, textures. Its about the overall appearance of the subject, which makes it jump out and makes the viewer want to eat it.


When Im not busy working my my photography course assignments, i'm busy reading articles and forums on food photography tips, and I learn a lot about composition from professional food photographers.


This week, I made myself egg congee for lunch - a light chinese meal consisting of congee (rice), egg, spring onion, ground white pepper and fish sauce...


I find the Digital Photography School's forums and articles so helpful and interesting. Here's a good article with some camera angle tips for food photography!

Rick Stein's Spaghetti alla Carbonara

I used to catch BBC show Rick Stein's Mediterranean Escape on television all the time when we were living back in New Zealand. One of the dishes he made on one of the episodes was so easy and was a usual item on our weekly dinner menu - his Spaghetti alla Carbonara


The purpose of these photos was simply to play around with my composition, styling and props :)

Tuesday, January 25, 2011

Sweet and light

Over the weekend we hired a Canon EF 70-200mm f/2.8 L IS USM Lens. We currently only own two lenses. A Canon EF-S 17-55mm f/2.8 IS USM, and a Canon EF 50mm f/1.8 prime lens. I had been wanting a telephoto lens for quite some time, especially to allow me to obtain those tighter shots in my food photography.


So this week has been my opportunity to experiment with the 70-200mm. So what do I think? To be honest, I don't really know. Apart from the considerable increase in weight this lens has compared to the 17-55mm, obviously having to stand at a much further distance from my subjects. I am still yet to learn what advantages a telephoto lens can bring to my photos. I suppose due to the longer lens and with aperture f/2.8, it allows my backgrounds to 'drop off' more and allows the subjects in my photo to appear more 'stacked'. I think i'd much rather buy an extension tube instead of investing in a telephoto lens for food photography at this point. After all, Its not like i work in a big studio kitchen - just our little 8x5m apartment kitchen :) I will be conducting some research this week on why a telephoto in regards to the output quality of food photos.


I wanted to bake something with chocolate this week because it had been a while since I had a nice chocolate flavoured cake. But I didn't want anything too sweet and rich either, so I decided to bake a basic vanilla and chocolate marble cake with a hint of lemon. 


Now time to experiment with the 'new' lens. These photos were taken in very low light, with the lens mounted on a tripod of course. I struggled a little with setting up my composition from time to time because of the weight of the lens (i'm a somewhat small person so hand holding this lens can be a bit of a struggle!) and having to always step further and further back.


This week I am also trying to experiment with different Photoshop Actions and Filters. I really adore Aran Goyoaga and Beatrice Peltre's work. I love the colours and textures they use in their food styling. Textures, creative props and colours really make a difference in excellent food styling, so I did a bit of shopping this week to add to my prop collection! I noticed that they also play on Photoshop Actions to  bring out these colours and textures in various different ways. 


Food photography is all about making the food look the way consumers see it in their mind's eye. Its not as simple as taking a beautiful dish you cooked for dinner, throwing it down and taking a photo. Alot of the work goes into the styling itself.


The recipe I used for this cake is very easy. I took a basic recipe and adapted it a little, just by throwing in some lemon zest and lemon extract to give the cake a little bit of a lemon flavour. I also substituted milk for buttermilk in this recipe. 


Lemon and Chocolate Marble Cake
  • 2 cups all-purpose flour
  • 2 tsp baking powder
  • ½ tsp salt
  • 1 cup white sugar
  • ½ cup butter, softened
  • 2 eggs
  • 1 tsp vanilla extract
  • 1 cup buttermilk
  • 2 Tbsp unsweetened cocoa powder
  • zest of 1 lemon
  • 2 Tbsp lemon extract
Lemon Glaze
  • ¾ cup confectioners sugar
  • 2 Tbsp lemon extract

DIRECTIONS
  1. Preheat oven to 350 F (175 C). Grease and flour a 9 inch round cake pan.
  2. Place flour, baking powder, salt, sugar, butter, eggs, vanilla extract and buttermilk into a mixing bowl. Beat slowly to moisten, then beat with an electric mixer at medium speed for about 2mins until smooth.
  3. Beat in lemon zest and lemon extract. Reserve half the batter. Pour the remainder into the pan.
  4. Stir cocoa into the reserved batter. Drop by spoonfuls over the top of the white batter. Using a knife, swirl the cocoa batter into the white batter to incorporate it in a marble effect.
  5. Bake in preheated oven for 30-35mins, until an inserted wooden pick comes out clean.
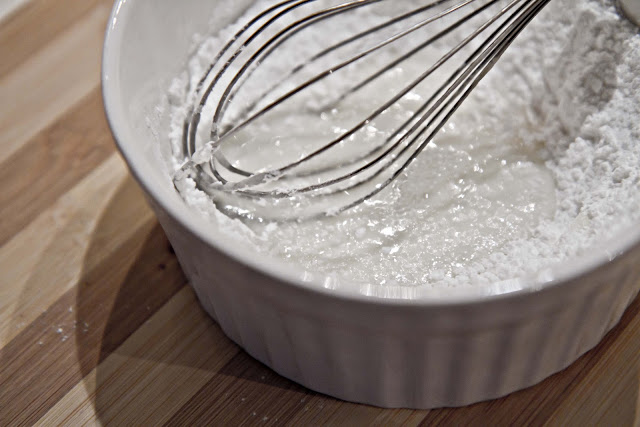
  6. Remove cake from oven and let it cool completely. Meanwhile, for the sugar glaze, pour confectioners sugar in a bowl and hand-mix in lemon extract until desired consistency. Use a piping bag or spoon to drizzle glaze over cake.


Wednesday, January 19, 2011

Appetizer over powers main

Laura Vitale does it again! This week I tried another of her bruschetta recipes for a Monday night appetizer. She never ceases to disappoint. I must say though, the main dish, Spinach Mac and Cheese, I prepared from a recipe out of a magazine, to accompany this appetizer was such a disappointment, I wont even bother providing it as it was so bland.


The Mac and Cheese was a lot of effort for what it was worth. Of course, I captured a few shots anyway..


Bruschetta is such a great Italian appetizer that consists of grilled bread rubbed with garlic and extra virgin olive oil... with a variation of toppings. Laura has a Asparagus and Prosciutto Bruschetta which is really delicious! I highly recommend trying this recipe!


I made a slight mistake with the recipe with the order of the basil and cheese, but I think my mistake ended up working nicely for the photo :) I find that I get a little bit impatient as Im trying to get that perfect shot. Impatient about the food going cold mainly. Im starting to learn that its a good idea to set up your frame first, and to get your camera settings right before styling up your food. After all, with food photography, its important to be quick so your food stays looking fresh!


Wednesday, January 12, 2011

Taking sushi to another level...

As part of my food photography exercises, I am trying to get involved in as many online forums and groups as possible. At the moment, I am involved in a 12 month 'Foodography' Challenge, where any food photography fanatics such as myself are free to take part in. Each month they announce one particular vegetable or fruit and the challenge is to capture that item as creatively as possible. This month was 'Avocados'. 


I decided to put a little spin on things, so took the idea of a Japanese setting with sushi and turned it into something quite different.

Saturday, January 8, 2011

I found my thrill, on Blueberry Hill...

Whenever I think of blueberries, the first thing that comes to mind is the song 'Blueberry Hill' by Fats Domino - don't ask me why.


One thing I have loved about Canada that diffs from New Zealand is the abundance of blueberries, raspberries, and blackberries sold everywhere. This weekend I decided to bake some Lemon CupcakesI found a recipe on Jamie's My Baking Addiction website. I LOVE her website, not only for her recipes but also because I love getting food styling ideas from her work.


To top it off, the cream cheese frosting. There is something about cream cheese frosting which I have never been able to get right. My version always turns out too liquid, and not thick enough for me to pipe. I intended to bake these lemon cupcakes mainly for the opportunity to photograph them. Although my frosting did not turn out the way I had hoped, at least my photos did (Im sure with room for improvement of course).


The blueberries were upon request by my husband. At first I hesitated to add blueberries to my lemon cupcakes, but when I was faced by the result of my frosting, I decided to add them. I had to save my photo opportunity somehow.


Today was a good day for lighting as there was a lot of natural light coming in through our windows. I love shooting with this amount of natural light, no need for a flash or a tripod.


These 12 cupcakes only lasted a few days....
All the lemon cupcakes gone, and still a box full of fresh blueberries left. I decided to make fluffy blueberry buttermilk pancakes for breakfast the next morning. Another opportunity to extend my food portfolio perhaps. 

Fluffy Blueberry Buttermilk Pancakes
(Makes a dozen pancakes)
  • 1/2 cup (125ml) unsalted butter
  • 2 cups (500ml) buttermilk
  • 2 cups (500ml) all-purpose flour
  • ¼ cup (50ml) granulated sugar
  • 2 tsp (10ml) baking powder
  • 1 tsp (5ml) baking soda
  • 1 tsp (5ml) salt
  • 2 eggs
  • 2 tsp (10ml) vanilla extract
  • butter for cooking
  • blueberries
DIRECTIONS
  1. Melt the butter and then set aside to cool
  2. In a large bowl, stir flour, baking soda, baking powder and salt with a fork. Make a well in the center of the mix. 
  3. In a medium bowl, whisk eggs with buttermilk, melted butter and vanilla.
  4. Pour wet mixture into dry mixture and stir with a wooden spoon until just blended. The more lumpy your mix, the fluffier your pancakes will be.
  5. Melt more butter onto pan at medium to medium-high heat. When the pan is hot enough, pour batter into the pan making about 6-inch pancakes. Gently press a few blueberries onto each pancake.
  6. Cook until bubbles form at the top of all pancakes and edges start to brown. Should take 2-4 mins on each side. Flip and continue to cook until bottom of pancakes turn golden. 

Why make buttermilk pancakes from a box when you can make them from scratch? Once you do this, there is no going back. 


Baking soda is pretty important when it comes to buttermilk pancakes. Some may not know this but baking soda reacts strongly with the acid in the buttermilk. The baking powder provides extra lift from the heat that comes from cooking the pancakes, and this combined with the baking soda provides 'double lifting power'. This combination in ingredients is essential if you want to achieve fluffy buttermilk pancakes... and buttermilk pancakes SHOULD be fluffy :)


Tuesday, January 4, 2011

Before the love of photography...

1984: born in Sarawak, Malaysia. Grew up appreciating Malaysian cuisine.


1993: moved to Auckland, New Zealand with my family. "For a better education" as mum and dad would say. My love for Malaysian cuisine grows stronger. 'Absence makes the heart grow fonder' as they say.


2002: Met my husband, Federico, of Argentine descent. 


2005: After graduating from the University of Auckland, moved to Wellington, New Zealand to continue with post-graduate studies in Information Systems. Here in the very cultured city of Wellington, I developed a strong love for great coffee, rustic cafes and wine.


2006: Travelled to Malaysia with my husband. Introduced him to the food of my roots.


2007: Travelled to Argentina with my husband for 2 months. Empanadas, paella, Dulce de leche, vino... developed a love for South American cuisine and culture.


2009: Purchased our first DSLR, Canon EOS 400D. 


2010: Got married at Soljans Wine Estate, a vineyard in Auckland, New Zealand. Developed a love for professional photography. Enrolled into a Professional Photography Diploma course with The Photography Institute of New Zealand. 


Sold our 400D and bought a Canon EOS 7D (I mainly shoot my food with a Canon EF-S 17-55mm IS USM lens).


Nov 2010: Relocated to Toronto, Ontario, Canada due to my husband's secondment with work. 


2011: Right now, I am still working through my photography course, while practising my skills in photography ...food photography especially. I also love to cook and bake. With the passion for these few things, I have decided to start a blog so here I am.


My ultimate goal in life (apart from starting a family) is to become a freelance photographer.  Thanks for taking the time to visit my blog and I hope you enjoy my journey of novice baker, food stylist and food photographer to one-day, successful freelance photographer :)